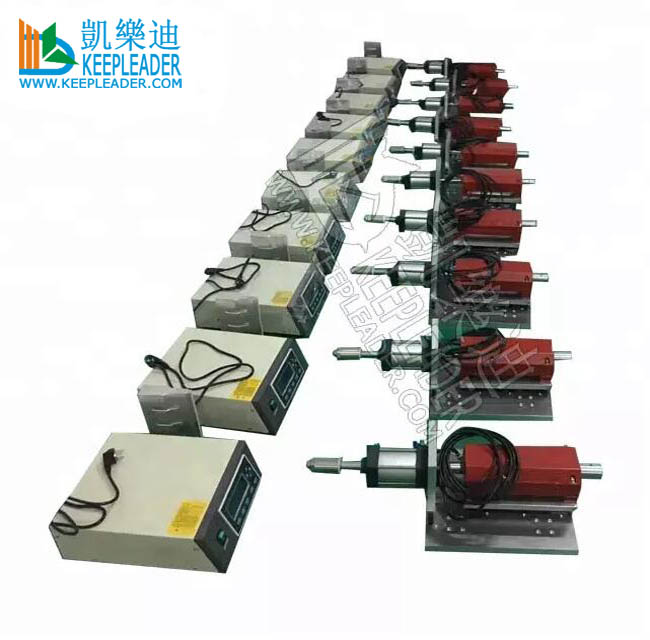
Plastic Welder Ultrasonic Welding Stack for Ultrasound Solder Actuator Assembly Ultra Sonic Unit of Thermoplastic Bonding Device

Plastic Welder Ultrasonic Welding Stack
Plastic Welder Ultrasonic Welding Stack is made up of three components: the transducer, booster and ultrasonic horn, the pneumatic/motorized press and ultrasonic generator can embodied as requested, the quality of mating surface between these three units will have a major impact on the operation efficiency of your ultrasonic welding machine, if they are not flat, if they become corroded or they make poor contact, they become a weak link in the transmission of ultrasonic vibration, and power output is wasted, tuning iis difficult, noise levels will increase and heat damage to the transducer is possible
Let’s look at each components and reasons for possible failure
Ultrasonic horns crack due to possibility below
Metal to metal horn contact
Fatigue over time
Poor original design (sharp corners, slot design and finish, drastic change in coss section and tuning to improper frequency, such as radial versus axial)
Improper horn material selection, titanium is better than aluminum, particularly, the spot welding process integrates with titanium horn
Being too highly driven by the booster, which results in exceeding the elastic limits
Over-tightening the horn on the boosters
Over-tightening the studs
Flaws in the horn material
Applying uneven welding pressure to the horn face
Booster crack or fail attributes to possibility below
The similar reason as above for horn failure, as well as possibility below
Operating ultrasonic horns that are poorly designed and or tuned to the improper frequency
Out-of-balance horns or applying uneven welding pressure to the horn
Transducers fail results from possibilities below
Dropping the transducer and breaking the ceramic
Poor Horn design and/or out-of-frequency horns
Over-tightening of the booster
Moisture from air lines seeping into housing
Shock from the application (insertion), this is ore likely to happen on older units without transducer protection
Tightening booster or horn without a spanner wrench on the transducer front slug
Heat developed by problems already listed
Reconditioning the ultrasonic stack
It is important to check the stack regularly to make sure the components are in good working order, in addition, there are several steps you can take to recondition the stack
#1: Disassemble the transducer/booster/horn stake and wipe the mating surface with a clean cloth or paper towel
#2: Examine the surface, if they appear to be in good condition, slip to step #9, if any surface is corroded or shows a dark, hard deposit, it should be reconditioned (step #3~#8), if the mating surface of any component shows evidence of crowning, cupping or any other out-of-flatness condition, contact an ultrasonic industry professional for advise, very small, isolated pits in the mating surface are generally not serious problem
#3: If necessary, remove the mounting studs
#4: Tape a clean sheet, energy cloth to a clean, smooth, flat surface, a piece of plate glass is usually suitable
#5:Hold the component at its lower and carefully stoke it in one direction across the energy cloth, don’t apply pressure at the component’s weight along will suffice, note: use extreme care to avoid tilting the component, loss of flatness on interface surfaces may render the welding system inoperative
#6: Perform a second stroke, then rotate the part on-third turn and repeat
#7: Turn the part the final one-third and perform the same two stokes, be certain to perform the same number of stokes/two at each location
#8: Re-examine the mating surfaces, and repeat steps #5 through #7 until most of the contaminate has been removed, this should not take more than two or three complete rotations
#9: Before reinserting a stud, examine it to make sure the treads have not been damaged, clean all foreign material, grease and oil from the treads of the stud and the threaded hole using a clean cloth or towel
#10: Replace worn or damaged studs with those specified by the manufacturer, ordinary steel set screws are not properly heat treated for use as stake studs
#11: Very lightly cost the flat mating surfaces with high-pressure silicone grease or insert a high-temperature polymer film washer (not both) to promote good transmission of ultrasound and prevent the stack components “cladding” together
#12: Torque studs and mating surfaces properly, as indicted in the accompanying table showing correct torque values for stack component assembly, loose studs or joints will cause overloads or intermittent operation, while excessive tightening results in material distortion that shortens component life
#13: Install the stack in the welder and test ultrasonic operation
A note about flatness
It is essential that the mating faces between an ultrasonic transducer/booster and booster/horn be flat and parallel, if any air gap remains, there will be a resultant loss in power output and efficiency, coupling may be so poor as to prevent the starting of ultrasonic stack
The condition of excessive crowning, or uneven contact surface, is normally evidenced by a burnished appearance only around the bolt area of the contact surface, this indicates that contact between the members is occurring only at the burnished area and not around the periphery of the surface
Search
ContactUs
ADD: Rongxing Bldg, Bulong rd, Bantian st, Longgang, Shenzhen 518129 P.R.China
ZIP: 518129
Contact: Ms Wang
Tel: +86-755-84190358
Fax: +86-755-84190358
Mob: +86-13590415784
Email: sales@keepleader.com

Welcome to visit our Factory!!!
Copyright ©2004-2026 ultrasonic cleaner,ultrasonic welder,high frequency welder,Ultrasonic golf Cleaner,High frequency packing machine,Vapor degreaser,Transparent Cylinder making machine,portable spot welders All Rights Reserved.
ADD: Rongxing Bldg, Bulong rd, Bantian st, Longgang, Shenzhen 518129 P.R.China ZIP: 518129 Contact: Ms Wang
Tel: +86-755-84190358 Fax: +86-755-84190358 Mob: +86-13590415784
Email: sales@keepleader.com 技术支持: keepleader

